Search This Blog

Wednesday, 28 September 2011

Silver Effect?

So I've been doing a lot of revised editing recently, since learning a lot from the course I'm studying. Its pretty evident that I am miles ahead from where I started a couple of years back, and the post processing skills I have, have improved massively.

I've been trying recently to achieve a sort of 'silver' effect in some of the portraits, and I've been having some difficulties. I've got a little bit of where I want the portrait to be, but haven't quite got the method yet.

I have been using the black and white filters, opacity layers and blending modes to create a dulling effect on the images, then played around with the colour toning, and dodging and burning. I just can't quite seem to get the hang of it.


This is what I have achieved so far, and I quite like them as they are, but what I'm really looking for is some feedback/suggestions on how I could get a more silver-ish effect out of the images.

Sunday, 25 September 2011

Back into the realms of the Studio!

Just a quick update today, very busy lady!
After a summer out of uni, and consequently out of the studio - we went back into it the other day for our first session with Brian Spranklen.

We only really covered some of the basics, to get back into the swing of things and reiterate what was learnt last year.

In the end, there was only half an hour or so to get some shots in - which was a real challenge!
The first set up I used, was a large soft box in front/just above the subjects head, to achieve the basic lighting image. 
Fairly standard, and in my opinion not very exciting.

For the second set, I used a honeycomb directed onto the subjects face, straight onto the tip of the nose to produce what's called 'Beauty Lighting'.


I'm much happier with the second, and with more practice in the studio this year I'm really excited to see what I can produce!

Wednesday, 24 August 2011

Artistic Nude

I think it's about time to go back to another project don't you? So I bet the title got you excited right? think it's a joke? ...Nope, no joke! 

You see, for the final DMP project in first year of Uni our task was to produce two A3 high res prints, one portrait and the other still life. Now obviously I'm not talking about the still life today, it was only a pot anyway!

I had no idea where to start for a portrait, even though this module was based on skill and technique, I didn't want the standard commercial portrait you see of a high res wrinkly old man smiling at the camera. And it was only until after a session led by Brian Spranklen where he went through some slides with us, that I found inspiration for my portrait. 

He went through some photographs from Richard Avedon, and there was one that just stood out and stuck in my head until I got home.
  
From what I can find, it's a shoot for vogue and the model is Lauren Hutton, but anyway, I thought this would be perfect inspiration for my portrait image.

So I posted an ad on my course page on Facebook, and huzahh! to my surprise, I had a few volunteers! We set the date and time and got shooting.

Now I'm not going to deny that I felt a little uncomfortable shooting my class mate nude, but it was much easier than finding a stranger to shoot. 

I didn't want to copy the image I just wanted to use it as a starting point for the shoot, so we tried a few positions with the theme being the shape from the inside of the cardigan over the chest and up to the neck, because this is the part I loved the most from the original image.


The model is Emma Hand and she was wonderfully calm considering the circumstances, and took direction very well.

Now obviously I took a less 'glossy' route with the skin, I decided not to use and wet products to highlight the skin, not only because I thought it was a bit much for me and my class mate, but because I have always preferred the more 'matte' look for the skin tones and shadows in a fine art nude.


The images were submitted in colour, but I've re edited these and it seems there is a bit of a theme appearing with my editing styles. This has been one of my favourite projects and any feedback on these images would be grately apreciated!

Sunday, 21 August 2011

Daunting Experiences Pt - 2


Greetings again from a very worn out Tess! This is the second part of a 2 part series detailing my experience at my first wedding shoot, as the main photographer.

In the first part I explained my preparations and worries, and in this part I shall look back on the shoot, which was on Thursday.


So I'll start with before the ceremony.


The ceremony was scheduled to be at 3:30, with the Groom arriving at 5 past, and the Bride at 20 past. So I did the obvious thing and got there about an hour early, to scout out the location, where the group shots would be, and where I would shoot from in the marriage room. Here in lies the first dilema, The marriage room was dark and there was not a lot of ambient light - and to make it even worse, the windows were on the opposite side of where I was shooting from (where I was told to shot from)!

So good job I was there early right? It wasn't that I couldn't handle it, it was just very difficult to deal with when I couldn't use flash! So I ended up on ISO400 which I suppose isn't too bad but I really prefer to be at 100 or less. During the ceremony I pictured my list and shot as many angles as I could whilst being in the dark etc. It got a lot easier as I loosened up a little and ignored my loud shutter noises.

After the ceremony I had to rush outside to catch the B+G walking down the stairs and then onto the group shots. The light was good so I didn't need a fill in, and they only wanted a couple of groups, so it was fairly quick too. At first I did forget my ISO was up, but I took it back for most of the shots.

The Reception wasn't until half 7 so I had a bit of time in between to breathe and get some scran. I got there about half an hour early to get my settings etc and a drink (non-alcaholic of course!). The Bride requested pictures of the cake cutting and the first dance which is fairly standard so I took a few candid shots until the cake was cut. Now this was a real problem. The cake was in the corner of the reception room, with no light, so my camera couldm't focus properly (autofocus). I did as much as I could with the manual focus but it was pretty hard to see since it was so dark. Good job I had a flash gun at the ready though aye?

For the first dance I shot some normal and some eperimental images with the use of second curtain flash. I think these were the shots I was most pleased with.

So after a very tiring day of being nervous, rushing around on my knees trying to shoot everything on the list I think it was a good experience to have for a first wedding. If there was a bigger wedding party with a complex range of family group shots, I honestly doubt my skills would have sufficed, but as it was I did my best and hope that the couple are happy with their images. As for the future? I'm not sure weddings will ever be my speciality, but I'm always going to be open to the chance, maybe even for a second shooter ?


Thursday, 18 August 2011

Daunting Experiences Pt - 1

As you may notice, today's post is a 2 part blog and will be completed in the next few days.

Last week, a posting was made advertising for any interested photographers willing to shoot a wedding this week by one of my fellow students. BOOM! As soon as I saw I contacted her and hoped the position hadn't been taken because I have been dying to shoot a wedding for ages. The Bride contacted me and said she still needed a photographer so I was in!

And then it hit me.......


A WEDDING?!?!?!?!


Ahhhh *^")%^$#@...


I thought to myself 'What have I got myself into???' you can imagine the horror on my face as I realised I only had a week to prepare, after all this is my FIRST wedding shoot. After a while of sweaty palms, ventilating and tummy butterflies I decided this wasn't the way to go about it.

My first concern was that my skills were not proficient enough for the task (I'm sure I'm not the only one to have come accross this feeling), but after a good chat with my trusty other half (who always seems to say the right things!) I came to the conclusion that I should trust in my skills and do shoot to the best of my abilities.

My other main concern was that I would not have a clue what to expect, what to do and where to go at what times etc so I've pretty much spent the last week preparing myself for the task. Reading though all the websites, mags and books I could find explaining the different techniques, planning stages and tips I could possibly need. I would definitely recommend doing this to anyone thinking of shooting a wedding, very useful stuff - 'Turning Pro' mag I would also recommend.

So today's the day! (not dolmio day of course) I've had my weetabix, it's forcast to rain (that will prove difficult) and I think I'm fully prepared for what will be my first wedding shoot.

I've got my tripod,
camera,
2 charged batteries and the charger,
flash gun,
spare batteries for that,
plenty of memory cards,
extensive shot list,
huge umbrella,
reflector if needed,
and moral support from my dad haha!

I've had a chat with the Bride (she's really nice) on Sunday so I pretty much know whats happening today, and naturally taking into account this is a small wedding and this is experience for me - she's getting an uber good deal.

Keep an eye out for the second half and the conclusion of the shoot. Wish me luck! Eep!


Wednesday, 17 August 2011

Infra Red? Part 2

I told you to stay tuned for more Infra Red and here are the results! These shots have been taken on my recent trip to Devon, in a lovely National Trust house/garden called Killerton.


 Needless to say I'm less than impressed with the results, being a specially gloomy day with not a lot of light seaping through the trees like I imagined but then it's not always as easy as that. The style is interesting, with marks, grain and light spots which come naturally with the 'experimental' fashion in which these were taken - although I do usually work for sharpness and detail, so it really is a new direction for me.

The last set of images I took with an infrared filter were fairly interesting and were set at 30 second exposures at the lowest F stop possible depending on the zoom. For this attempt I had a go at something slightly different, and used the 'bulb' setting. This is the setting after the shutter speed has reached 30 seconds (well on my camera it is) and the exposure depends entirely on how long you want it to be, since once the shutter is pressed - light is let in (in this case only infrared) and only when it is released does the shutter close.

Now obviously I found it extremely useful having a remote trigger which could be set to 'hold' the button rather than standing at my tripod with my finger on the button for 10-15 minutes at a time!

Since the exposures I were setting were around these times, it was very frustrating when people around the park stood infront of the camera for 2-3 minutes at a time, but phew! the long exposures made sure these people didnt show up in the images.

Another issue I came accross was a big white out spot in the middle of the images, on the longer exposures. I'm assuming this is because there was too much light on the same spot on a continuous exposure but I have limited knowledge of this and would apreciate any information on the subject!

A dissapointing result from the shoot, however I did edit the normal versions (since I take a couple to get the original image set) and they looked ok:


I have a preference for these images, however I can understand the appeal of the style in the Infra Red images.

However, I think if ill be attempting this again in the future - I definately need a lower number Infra Red filter because this one seems to be a bit too much for what I'm after!


Saturday, 13 August 2011

Miss me?


It’s been a healthy 2 weeks since my last post! Well not so healthy with all the clotted cream teas and ice cream in the land of Devon – but hey, it’s been 2 weeks!

Not much on offer from Devon however I probably could have made a bit more of an effort to explore areas more. Here are a couple from a little Donkey Sanctuary in Sidmouth, please bear in mind I have never shot animals and I took a bit of a different approach to editing – enjoy!


Wednesday, 27 July 2011

PARIS


So last year I went to PARIS! It was the trip for the first year of Uni, which is pretty damn good if you ask me (I know you didn’t...). 

The trip was mainly based around ‘Paris Photo’ where some of the best photographers exhibited their work at the Louvre, but we made some other visits such as the EIFFEL TOWER! Haha

Anyway, if you want to know more about Paris Photo I suggest this website to start with: http://www.parisphoto.fr/?lg=en

And I would definitely recommend it as a visit even just to glance at some top photography.

Anyway I’m not here to talk about Paris Photo, although that would be nice, and fairly simple.
I’m here to talk about photographing in public. I don’t know about the rest of you but I find it a hell of a time taking photographs in a public space, of public people or buildings. I’m probably one of the most tame, shy people that any of my friends or relatives will know, and being shy definitely does not help me with my piccies!

I mention Paris because it was a prime example of how difficult it was for me. I found myself watching other people in my group snapping away, popping up and down streets and round corners just whistling through the process! I started to feel so awkward and found that I was making excuses not to take a picture I wanted. – The light isn’t right – I don’t want to wait around for the people to move – I don’t want to be rude and ask to take a picture – I can probably do it tomorrow. I felt so under pressure because everybody around me was just snap, snap, snapping and I was just watching, making excuses.

Then we sat down. A brief moment past until I realised I most definitely needed to relax! I thought to myself – just do it, nobody gives a damn what you are doing, just do it. It doesn’t matter what anybody thinks, just do it! Well there’s nothing quite like a bit of self motivation but hey, I kept telling myself that and after a short while – my camera had joined the choir of snaps!

Ahhh... beautiful story aye? Ok well it’s not, but its things like these that can prevent any kind of artist from doing what they really want and it’s probably a lot more common than I think. I’ve been in many situations since, where I’ve had to give myself the ‘motivation speech’ but there is probably a better way.... haha! 

Anyway you’ve read the story here’s a few from PARIS!


Tuesday, 26 July 2011

Shape and Texture

Sometimes I find it's best just to forget about the 'meaning' of what a photograph is or could be, and concentrate on the simplest of textures or shapes

Forgetting about colour opens up a range of possibilities, creating images that you wouldn't necessarily have thought of.

I like how lines, patterns and textures create a sort of movement in a frozen medium, a flow inside an image.


Saturday, 23 July 2011

Infra Red?


Just a quick one today, being a Saturday an all!

Last autumn I went out for the day (ok I know that doesn’t sound too exciting but keep reading anyway...), with my camera to a little park called Etherow. It was massively sunny and I thought it would be a perfect opportunity to try out my Infra Red filter. I’d never really thought about trying out anything like it before, I don’t like the thought of nothing turning out right, that’s why I’m scared of trying film cameras! haha...but I tried it none the less. 

This particular filter was the cheapest one I could find on eBay. The reason being if I liked it I would probably want to invest in a better one, but it would do for the time being.

I stuck the camera on a tripod and got started on some positions. I wasn’t thinking too much about this just because I was trying it out and didn’t set my expectations too high. 

I soon realised that I probably should have read up on how to use this type of filter, since its nothing like the UV filters I use. The main problem being, once the filter is on – the viewfinder is black, so no point looking really! Since this stopped the autofocus working, I found I had to take the filter off, set the camera up and focus, hold it down and stick it back on which was a pretty lengthy process!

These shots were all on 30 second exposures on F8 if I remember correctly.


Now these didn't come out of the camera like this, I'll show you what I mean:


So a bit of editing needed, but interesting none the less - maybe this year I will invest in a better filter?

Stay tuned!

Friday, 22 July 2011

A Colourful Story

It’s day 3 and time to talk about another recent project of mine. It’s a little less heavy than the previous Sister project, but still very close to my heart (if I can say that about this type of project?).

The project was designed to cover my affections for fluorescent light and its powerful effect on my emotions. It was like I was trying to show the audience how it makes me feel, but without plainly explaining it. This project has influences of photographers such as Troy Paiva and Gregory Crewdson – but also Dan Flavin (which I will explain as I come to it).

The project is called Electric Vision – I had no choice on this matter, it being a university project and all...but that’s fine, it tied in brilliantly with what I had in mind.

Being immersed in a space of light and colour makes me feel fuzzy inside, ever since I was a little girl light and colour has just fascinated me. Every chance I get, I buy and collect any fairy lights and plasma orbs, twinkly sparklers and glow sticks – It’s almost as if I crave the feeling I get when I am immersed in the colours. I like to mix them up – maybe red and blue to make a beautiful purple in the middle, it fills me up with the colours and it’s great. Capturing this joy was the hard part, the first set of images was pretty much unsuccessful, I started in a literal sense – attempting to capture the atmosphere whilst being immersed in the light.

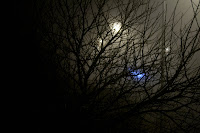
A more successful attempt came from a very lucky moment. You know those nights where the fog is so thick, you can only see a few yards, and all the street lights are collected and dispersed throughout the cloud of fog – where it’s like everything is at a standstill as you take in the atmosphere? Well I do, it happened whilst I was thinking about this project. 


Yeah, massive danger of becoming THE most cliché captured moment, but you know what? The moment was amazing and without having to do anything the feeling I crave was set out for me, and it was very powerful.


So I started to think, portraying this emotion like this might work if I search for environments where light and colour play a big part. This also, being quite unsuccessful – with again, very cliché results!


So it was time to try something different, trying to make somebody feel how I felt when immersed in light and colour was proving difficult, using photographs – so here lies where I had a look at Dan Flavin’s work. Dan Flavin uses installations with various fluorescent coloured tubes and shapes, creating visual and atmospheric effects.


This is much more like it, his use of space and fluorescent colour creates really atmospheric situations, well worth a look at some point if you spot an exhibition, most importantly – let me know so I can experience it!
This brings me to my conclusion, an installation bringing these elements of light, colour and space together to make an atmosphere that others could experience, and have their own feelings whether good or bad, it was there to experience.


Ok, so agreed these aren’t the best sketch ups but they do the trick I guess.
The installation was a space big enough for one person, to stand or to sit, to be completely immersed in light and colour; with the only light in the room being from the installation. One of the panels was left open for people to walk in and out. The space was filled with RED light which coincides with the installation being named RED. I used the colour of red for its positive and negative elements. 

RED. Physical
Positive: Physical courage, strength, warmth, energy, basic survival, 'fight or flight', stimulation, masculinity, excitement.
 
Negative: Defiance, aggression, visual impact, strain.
Being the longest wavelength, red is a powerful colour. Although not technically the most visible, it has the property of appearing to be nearer than it is and therefore it grabs our attention first. Hence its effectiveness in traffic lights the world over. Its effect is physical; it stimulates us and raises the pulse rate, giving the impression that time is passing faster than it is. It relates to the masculine principle and can activate the "fight or flight" instinct. Red is strong, and very basic. Pure red is the simplest colour, with no subtlety. It is stimulating and lively, very friendly. At the same time, it can be perceived as demanding and aggressive.


As well as being immersed in the powerful RED energy, I decided to add a different element into the installation. A camera was installed just above the lights, facing into the space onto whoever was inside. This live image was then projected onto one of the outside panels for the audience to see. (Demonstrated here as a see through panel...)


This resulted in a space where both participants could be involved, one being inside the space and the other viewing from the outside, the idea being I could receive a mixed reaction from the audience.


Was it successful?
Success, being an odd word for a university project because I guess it’s not really the point? The installation was a big risk, definitely a big step away from being behind the camera, you could say it was a bit of ‘out of the box’ thinking. But really, in my view it was the only way to portray the fuzziness inside to other people. 

Now, RED being described as being both a positive and a negative in the sense of emotional connections; the resulting reviews of the installation were both positive and negative (In the way that the installation piece made the individual feel inside rather than the quality and presentation etc...).

Some individuals explained that the space made them feel funny, in a good way, and that it was an exciting experience to be a part of. 

Other’s had said that the experience was quite negative, being on show to the audience whilst being confined to a small space full of redness. One individual described it as being tense and uncomfortable, and the red being an overpowering force in the confined space.

Overall in the broadest sense, the installation was a success – portraying a feeling that others could experience, I am sorry I don’t have any pictures from it though!